Test A Power Supply
Test a power supply through the use of a power supply tester is one the recommended way of testing power supply in computers. However, not so many people are informed on how this process should be conducted. In case you are among those who have experienced problems in testing power supply using a power supply tester, keep reading!
Conducting this process can take you about thirty minutes if this is your first time. However, in future, the duration can even be shorter. Below are some of the steps that you need to follow on how to test a power supply using a power supply tester:
How To Test A Power Supply Using A Power Supply Tester
- When preparing to undertake these steps to test a power supply, it is important that you begin by reading through the safety tips for the repair of PCs because the process involves working with high voltage electricity that can be very dangerous. Safety is always a primary concern and ignoring this step could be very dangerous on your part.
- After carefully reading through the safety tips of your PC, switch off the PC and remove the power cable. Also ensure that anything else that is externally connected to the PC is removed.
This will help in making your work more easier. Move the open case to a place where you are able to easily work on it like on a table. You can stuff the mouse, keyboard, monitor and the other peripherals in a safe place since you will not need them in this process.
- With these into place, you can begin unplugging the power connectors from each and every internal device on the inside of the PC. In order to make sure that you are having an easy time in undertaking this procedure, ensure that each power connector is unplugged from the power cable bundle that originates from the power supply. The termination of every group of wires should be to either one or various power connectors. In order to avoid tampering with the operation of your PC, it is advisable that you avoid disconnecting any other cables apart from just the power supply.
- For easy testing, ensure that you have all the connectors and power cables into one group. In the process of organizing the power cables for testing, it is advisable that you re-route and pull them away from the PC case. The reason why this is recommended is because it will offer you an easy time in plugging the power connectors into the power supply tester that you will be using.
- The other step that you should undertake is to check in order to make sure that the power supply voltage switch that is placed on the power supply is the ideal one that is set for the country that you are in. In case you are not able to establish this, it is advisable that you refer to the Foreign Electricity Guide to help you in determining the voltage settings in various countries.
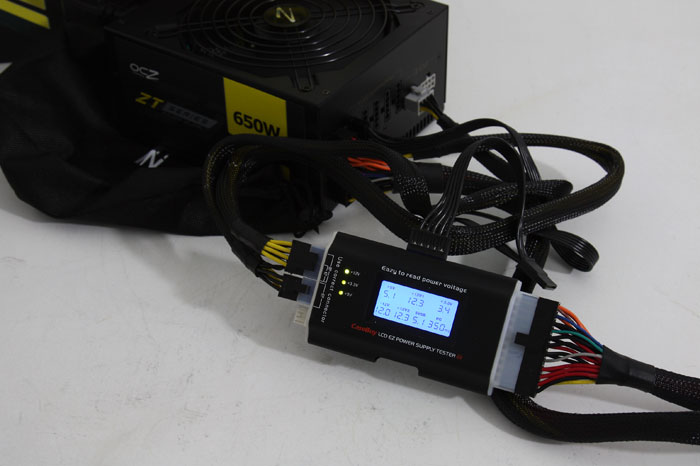
- Continue by plugging in the ATX 24 pin Motherboard Power Connector and the ATX 4 pin Motherboard Power Connector into the power supply tester then plug the power supply into an outlet that is live and press the switch. As you press the ON/OFF switch from the power supply tester, you will hear the power supply fan running.
- Check the Power supply tester's LCD display since it should be lit at this moment. Through the display, ensure that all the voltages that are displayed are within the ideal approved limits. Switch off the power supply and unplug it from the power source.
- Plug in any of the connectors to the preferred slots on the power supply tester in order to test the connectors too. In case the lights being produced are in line with the voltage delivered through the connector then know that you power supply is effective.
See Also...
Site's Navigation
 Subscribe To This Site


Copyright 2010-2016 Custom-Build-Computers.com | Faisal Opare | All rights reserved.