Connecting Motherboard Speakers
Step by step guide to connecting motherboard speakers. The speaker is a standard part of many of the desktop computers in the market today. These built-in speakers serve as an audio diagnostic tool when the computer is booting.
In case there is any hardware failure, the speakers would produce a beep that helps you to identify the hitch. For them to function perfectly, one ought to be familiar with connecting motherboard-speakers. The speakers have their own distinct port on the motherboards to which they are installed. Nevertheless, exactly how does one connect the speakers?
How to Connect the Speakers
This all important task simply involves connecting the speaker red and black cable in the motherboard port. Typically, the socket has four pins while the speaker connector has two pins. These are the steps to follow in connecting motherboard speakers:
1. Shut the computer down properly and disconnect the power cables. Place your system unit on a working bench or table but never on the ground.
2. Open the system unit case. Some PC cases simply have release levers, which can be slid off without using tools. In case your case isn't one of these, look for the correct screw driver to open up the case.
3. Place the case on its side for you to access the motherboard. This way connecting-motherboard speakers would be easier.
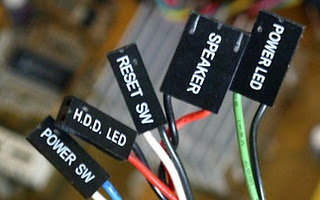
4. Find the connector towards the front of the case. This connector has two wires, a black wire and a red one, and a four-hole black connector on the other end.
5. Check the bank of pins on the motherboard for a section labeled 'speakers' or simply 'spk'. Fix the connector onto the four speaker pins. Make sure the connector's side marked a dot or an arrow is properly aligned with pin 1 on the motherboard. Connecting-motherboard-speakers is as easy as that. However, never try it when the PC is on.
See Also...
Site's Navigation
 Subscribe To This Site


Copyright 2010-2016 Custom-Build-Computers.com | Faisal Opare | All rights reserved.